I made a t-shirt in January! This is my first garment made from knit fabric and whew, that neck band almost did me in.
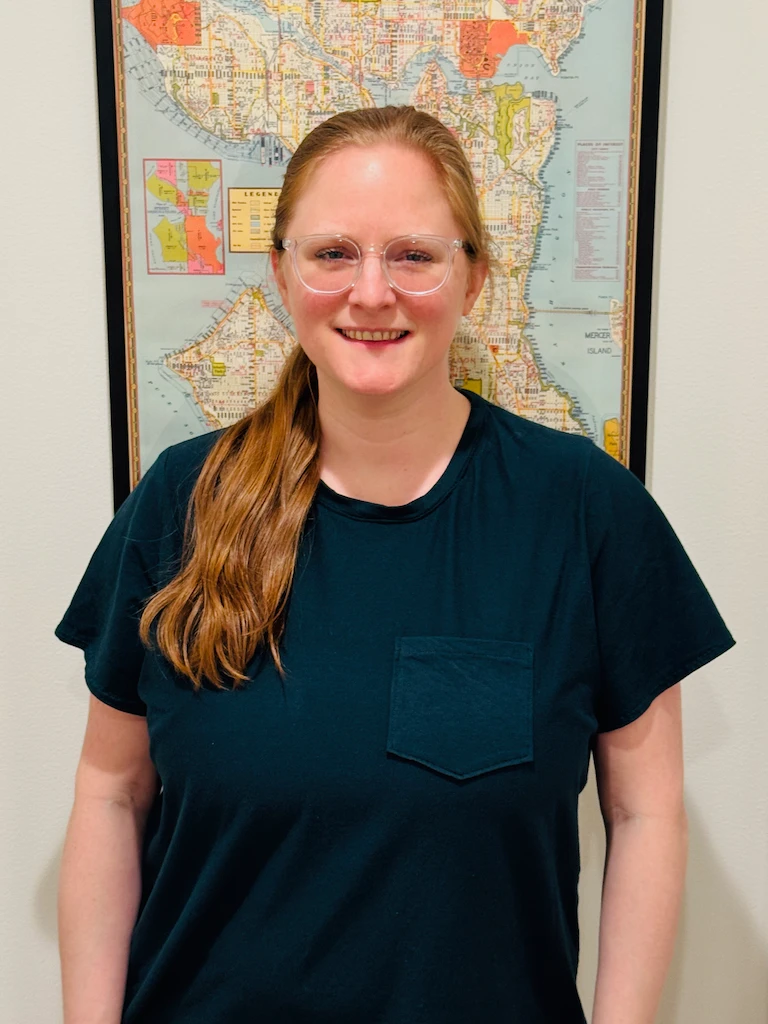
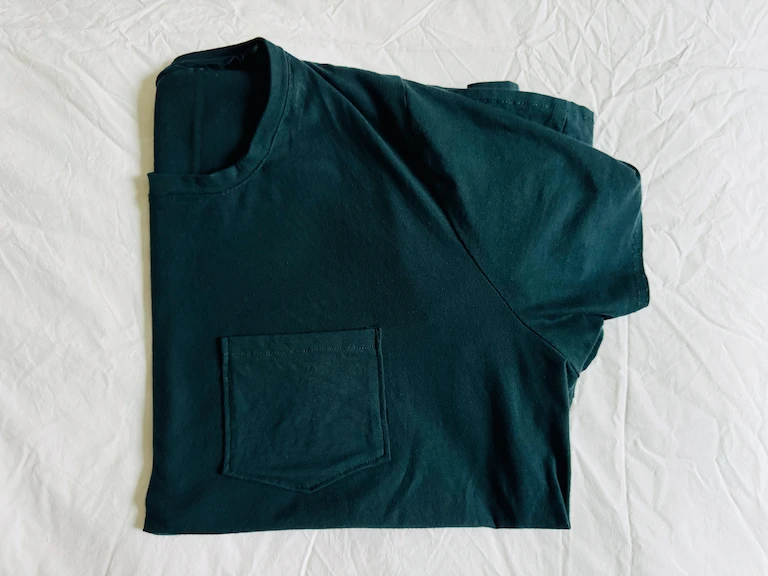
The Core T-Shirt is a free but very good t-shirt pattern by Closet Core. I made a size 18 with the short sleeves of view A, and longer hem in view B. The shirt is sewn up in a cotton modal fabric in the “peacock” colorway.
Cutting the fabric
I was a bit intimidated by cutting knit fabric with stretch, but it really wasn’t so bad. I simply proceeded delicately and tried not to stretch the fabric at all while cutting. I did try using a rotary blade to cut some of the pieces, but ended up preferring scissors.
Sewing
My mom let me try her serger on a scrap piece of fabric, but I could tell my skills weren’t there yet and it would be a big stretch (heh) to construct the shirt with a serger. I ended up sewing the seams on my Janome HD-3000 with a zigzag stitch (#12) with zag size (?) 3, stitch length 2.5, and tension 3. This is mostly reference for myself, by the way!
I thought the pocket might be tricky to attach without looking wonky, but the pattern includes markings so you can line this up correctly.
Attaching the neck band
The first thing the Core T-Shirt pattern has you do after sewing the shoulder seams is to assemble and attach the neck band. This was absolutely the hardest part, and I had to put it down for later.
I ended up having to employ a few different tricks in order to successfully attach the neckband:
- Inserting my pins perpendicularly to the seam line, instead of parallel. It’s usually recommended to go parallel (so you don’t strike a pin with your needle), but I found doing it this way made the pins less likely to pull out as the fabric was being stretched.
- Pinning on top of my tailor’s ham. I was able to kind pull things mildly taut over this curved surface as I was pinning.
- Basting before sewing the final seam. I actually did this twice—once before (1) and (2). The first time I ended up with a lot of gaps as the neckband shifted around. So the second time I basted a quarter of the neckband at a time so I could re-orient myself and fix any mistakes earlier.
The neckband attachment isn’t perfect—there are a couple ripples in the back—but I’m reasonably happy with how it turned out (AKA it is fully attached).
Shoulder & back neckline binding
The next step after attaching the neck band begins: “This optional step requires patience and precision, but results in a clean and professional finish inside your t-shirt.” The neck band did not carry the same advisement, so I absolutely skipped this optional step. Nope. Not gonna go well for me.
Instead, I did a simple topstitch (matching the topstitch on the pocket) to keep the neck band seam in place.
Sleeves
I got a little bit confused about how to orient my pattern pieces when attaching the sleeves to the body, so I found a sewalong video on YouTube. This person sewed the top in a much different order than the instructions, notably she did the side seams and the sleeve side seams (my term here) before attaching the sleeves to the rest of the garment. This is actually the second walkthrough video I’ve found that does things in a different order than the pattern. I like this approach because the pieces feel more “stable” to me.
So I sewed those seams and then shimmied the sleeves into the armscyes as the YouTuber did. Crafty Studio has some great tips for easing the sleeves in, starting around ~20:10.
I did make two mistakes here:
- I first topstitched the sleeve hem at 1/8”, which I found to be too close to the edge. I did it again at 1/4”.
- Next time I need to make sure the right sides of my sleeves are touching the right sides of the body, as I ended up with sleeve side seams facing out in the final garment. Not a big deal because they’re under my armpits in a dark fabric. If you notice that, you’re looking too closely!
The finished result
I ended up finishing my t-shirt the day before leaving town for a work trip, so of course I brought my shirt with me! It was so comfy to wear during a whole day of meetings, and (I think) looked nicer than a tech t-shirt.
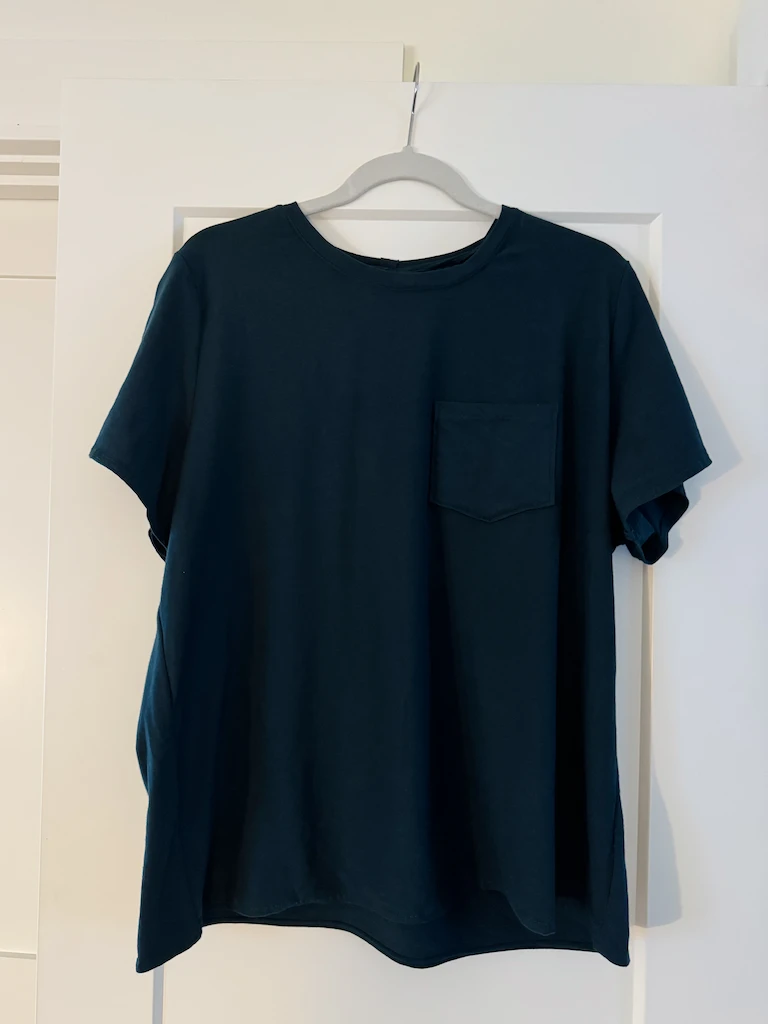
It is a bit roomy, so I think I could afford to go down a size if I sew this up again. I accidentally purchased way too much fabric 😅, so I think I’ll make this shirt again in view B—with the long sleeves—and no pocket.
Comments
No comments yet on this post.
Add a Comment